Next: Setting the date and time
Up: LBA-Linux Installation Guide R2
Previous: Creating a user account
Contents
Index
Subsections
Setting up a network device
If your computer will connect to other computers (for example, accessing the Internet or a local network), you will need to configure its network properties using this screen.
If your computer will never connect to other computers, you may skip this step and proceed directly to setting the date and time, by clicking on the Next button in the lower right corner of the screen.
The table on the Network Setup screen lists all network devices currently configured for your system. Initially, this table will be empty.
To set your computer up for network operation:
- Click on the Change Network Configuration... button.
- Set your computer's general network properties
- Add a specific network device, such as an ethernet card or dial-up modem.
- Click on the Next button at the lower right corner of the screen to contine to setting the date and time.
Setting general network properties
If your computer's general network properties will be provided automatically by a DHCP server or by PPPoE (as with, for example, many dial-up services), you may skip this section.
To set your computer's general network properties:
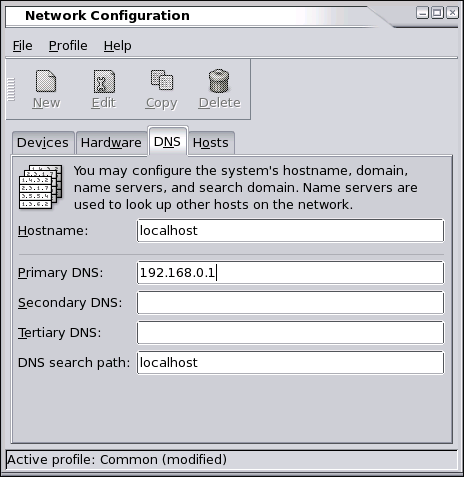
- Click on the DNS tab of the Network Configuration window (Figure 8)
Figure 8:
Setting DNS properties
|
|
- Enter the IP address(es) of your computer's nameserver(s) into the Primary, Secondary and Tertiary DNS boxes. At least one nameserver must be provided.
Configuring an ethernet card
There are two steps involved in setting up an ethernet card under LBA-Linux:
- Ensuring that your network card is detected by LBA-Linux.
- Creating a network device associated with your network card.
Both steps must be completed to successfully use your ethernet card under LBA-Linux.
Ensuring that your network card is detected by LBA-Linux
To ensure that your network card is detected by LBA-Linux:
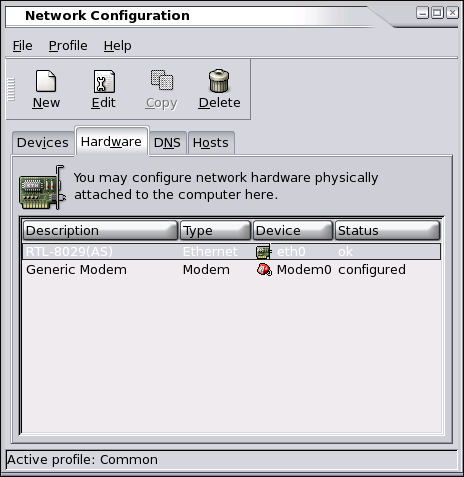
- Click on the Hardware tab of the Network Configuration window (Figure 9).
Figure 9:
The Hardware tab of the Network Configuration window
|
|
- If your ethernet card is listed in the hardware table, it has been automatically detected by LBA-Linux. You can now create an associated network device.
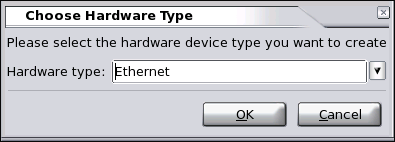
- Otherwise, click the New button from the Network Configuration window's toolbar to add your ethernet card to the hardware table (Figure 10). Select Ethernet from the drop-down menu and click the OK button.
Figure 10:
Adding an ethernet card to the hardware list
|
|
- In the Network Adapters Configuration window, select a network device to associate with your card (for example, eth0). Provide the appropriate hardware resource settings and click OK.
Figure 11:
Configuring ethernet card hardware properties
|
|
Your network card should now appear listed in the Hardware tab of the Network Configuration window.
Creating a network device associated with your network card
To create a network device associated with your network card:
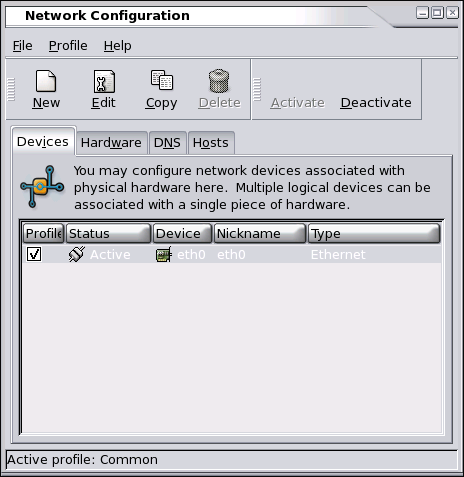
- Click on the Devices tab of the Network Configuration window (Figure 12).
Figure 12:
The list of network devices
|
|
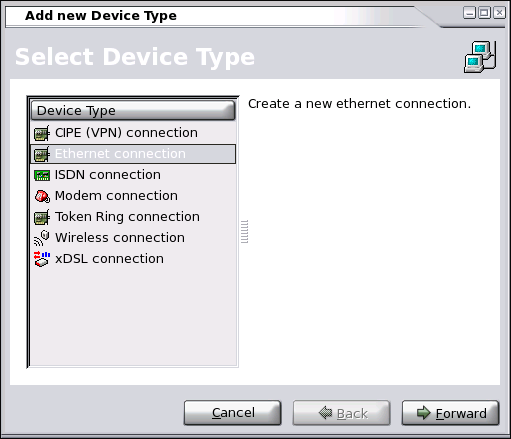
- Click on the New button from the Network Configuration window, and select Ethernet connection in the window that appears (Figure 13). Click the Forward button to continue.
Figure 13:
Adding a new network device
|
|
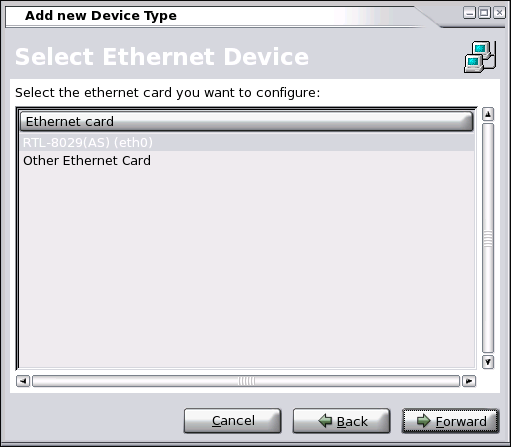
- Click on the description of your ethernet card from the list of devices in the window that appears (Figure 14). Click on the Forward button.
Figure 14:
Adding an ethernet device to the device list
|
|
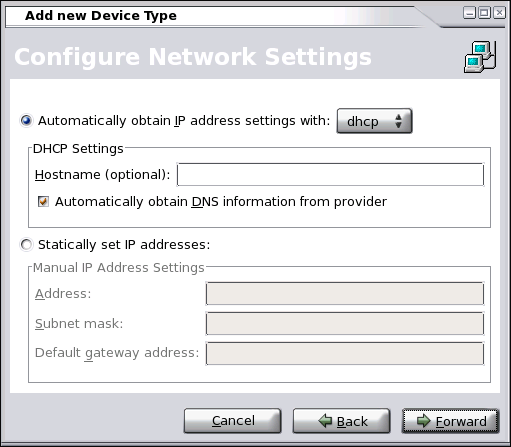
- Provide the appropriate IP settings for the network device in the Configure Network Settings window that appears (Figure 15). Click the Forward button to continue.
Figure 15:
Setting the IP address of an ethernet device
|
|
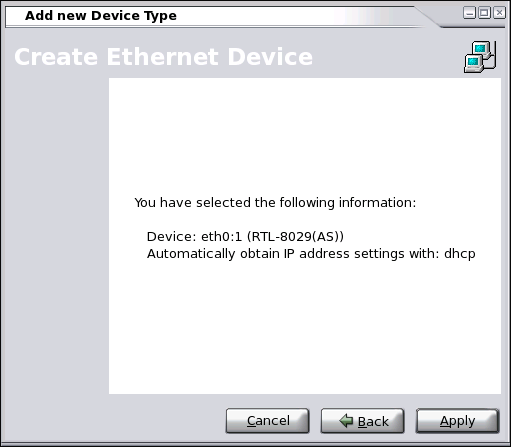
- Confirm the settings you have provided (Figure 16) and click the Apply button to create the network device.
Figure 16:
Confirming new ethernet settings
|
|
Your newly-configured network device should now appear in the Devices tab of the Network Configuration Window. Click on the description of the device, and activate it by clicking on the toolbar's Activate button.
Configuring a modem
There are two steps involved in setting up a dial-up modem under LBA-Linux:
- Ensuring your modem hardware is detected by LBA-Linux.
- Creating a network device associated with your modem.
Both steps must be completed to successfully use your modem under LBA-Linux.
Ensuring your modem hardware is detected by LBA-Linux
To ensure that your modem is detected by LBA-Linux:
- Click on the Hardware tab of the Network Configuration window (Figure 17).
Figure 17:
The Hardware tab of the Network Configuration window
|
|
- If your modem is listed in the hardware table, it has been automatically detected by LBA-Linux. You can now create an associated network device.
- Otherwise, click the New button from the Network Configuration window's toolbar to add your modem to the hardware table (Figure 18). Select Modem from the drop-down menu and click the OK button.
Figure 18:
Adding a modem to the hardware list
|
|
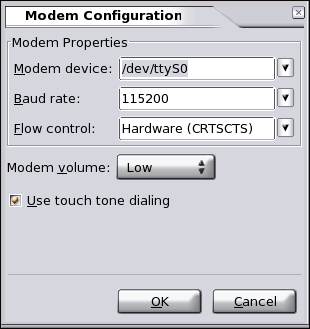
- Provide the approprate modem hardware settings in the Modem Configuration window (Figure 19) and click OK.
Figure 19:
Configuring modem properties
|
|
Your modem should now appear listed in the Hardware tab of the Network Configuration window.
Creating a network device associated with your modem
To create a network device associated with your modem:
- Click on the Devices tab of the Network Configuration window (Figure 20).
Figure 20:
The list of network devices
|
|
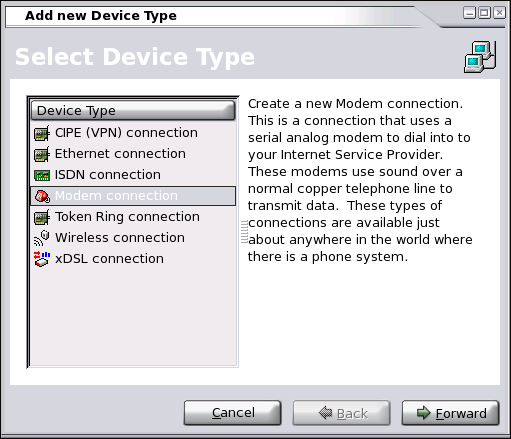
- Click on the New button from the Network Configuration window, and select Modem connection in the window that appears (Figure 21). Click the Forward button to continue.
Figure 21:
Adding a modem device
|
|
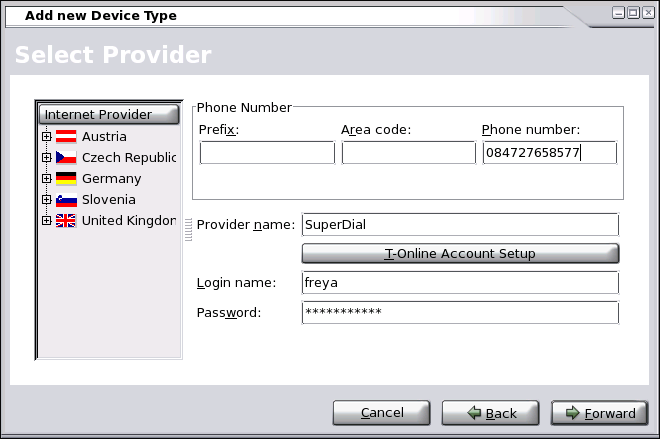
- Select an ISP from the sidebar list, or manually enter the dial-up phone number and your login details in the boxes provided (Figure 22). Click the Forward button to continue.
Figure 22:
Setting dial-up connection details
|
|
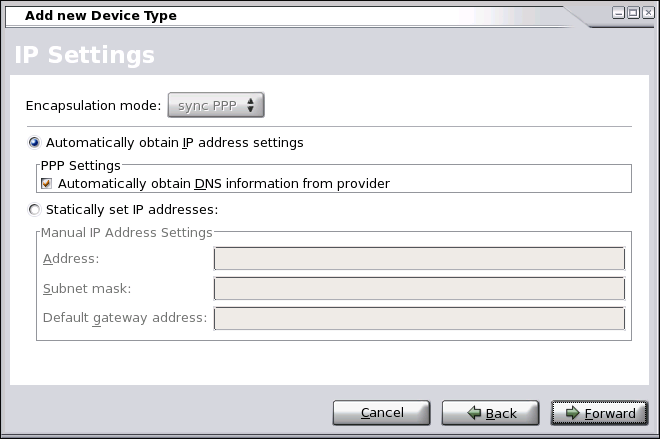
- Provide the appropriate IP settings for your modem connection in the Configure Network Settings window that appears (Figure 23). Click the Forward button to continue.
Figure 23:
Modem IP settings
|
|
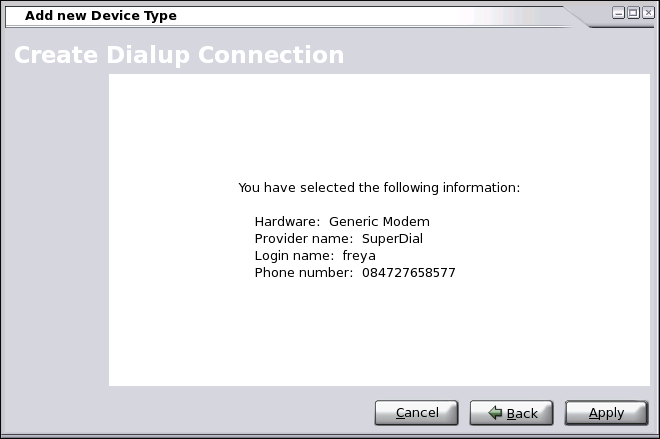
- Confirm the settings you have provided (Figure 24) and click the Apply button to create the modem device.
Figure 24:
Confirming new modem device settings
|
|
Your newly-configured modem device should now appear in the Devices tab of the Network Configuration Window.
Next: Setting the date and time
Up: LBA-Linux Installation Guide R2
Previous: Creating a user account
Contents
Index